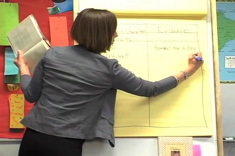
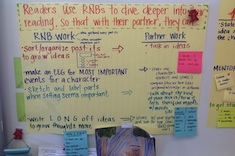
Peeking into classrooms at the very beginning of this new school year, I was surprised to see that many teachers already had lots of anchor charts (and completed word walls, too — but that's another article) posted in their classrooms. The charts were beautiful, with bright colors and cute illustrations or graphics. Some of them were made on desktop publishing — enlarged and laminated. Some were purchased at a teachers' store. Some were neatly lettered on manila chart paper. How did so many charts get put up so early in the school year? Were these anchor charts that the teacher had used in previous years? Did the teacher make the chart in isolation, completely apart from a lesson, without any student input? It makes me wonder if the purpose and benefits of anchor charts are really understood.
Anchor Chart Basics
An anchor chart is a tool to facilitate student self-regulation and support independence. It is visual evidence of the work done by teachers and students — a scaffold that can later be removed as soon as the students have learned the lessons reinforced by the anchor chart. Anchor charts are temporary by nature. A standard-sized version of the chart (8 ½ x 11) can be affixed in students' learning logs. Is the chart still up after several months? Then it's probably time to rethink the lesson, the chart, or the effectiveness of its location within the classroom environment.
Anchor charts are co-created within the context of a lesson or over a series of lessons. If an anchor chart is not co-created, it is destined to become wallpaper. The teacher and the students negotiate the language of the chart. The teacher acts as a scribe, capturing the students' actual words. An anchor chart purchased at a teachers' store can't ever be as effective as a co-constructed anchor chart. Even if you teach the same concepts each year, you can't really reuse anchor charts year after year because they need to be co-constructed with your current group of students. Hence there is no reason to ever laminate an anchor chart.
Some teachers like to alternate colors to help students differentiate between the lines. However, using more than two colors can actually be confusing, especially for beginning readers. Adding a photo, picture, or graphic can offer extra support in reading the chart for beginning readers. Choosing dark or concentrated colors also makes an anchor chart easier to read. When the chart is completed, it should be posted where the students can see it. Think of how difficult it would be for a six-year-old to read an anchor chart that is hung from a molding near the ceiling. Put the chart in an area of the classroom where it is needed — where students will use it and have easy access to it. The teacher and students should revisit the anchor chart frequently during the first week that it is posted. A teacher might have to remind students to refer to the chart. It is an important lesson on using resources to help students help themselves. Limit the number of anchor charts that are hanging at the same time. You don't want students to have to hunt for the chart that they need.
The Teaching Behind Anchor Charts
The respected teaching practices that are involved in getting an anchor chart launched and used in a classroom include gradual release of responsibility, think alouds, and shared writing. The teacher explicitly states his or her expectations, then models the desired practice (e.g., steps in solving a long division problem, giving an oral report), thinking aloud as s/he goes. Then the class engages in a shared experience of the task. The teacher demonstrates the desired practice with the students talking through the steps or process. The anchor chart can be co-created at this point using shared writing. Then there is a shift to guided practice, with a student modeling the desired practice for the class. The students review the anchor chart before they engage in the desired practice and use the anchor chart afterwards to reflect on how well they have succeeded. The teacher monitors the students as they attempt the desired practice and provides feedback. Finally, the students are ready for independent practice, using the anchor chart on their own to self-monitor or remind themselves what to do next.
Types of Anchor Charts
There are three common types of anchor charts: procedural, process, and strategy. The hallmark of an organized classroom is how well the students follow the classroom routines. Master teachers spend the first few weeks of school teaching routines, and report that this period of instruction is critical to the success of the entire school year.
Procedural anchor charts help reinforce the teaching of the classroom routines. Some examples of procedural anchor charts include how to use the MP3 player at a listening center or how to check out a book from the classroom library. You may find that procedural anchor charts need to stay posted for a longer period of time than other anchor charts.
Process anchor charts remind students of how to work through a process such as how to participate in a peer conference, how to solve a word problem, or how to find a word in the dictionary. In my state as part of the annual assessment, students are required to write a response to a reading passage. Most classrooms have a process anchor chart on the steps for writing a good extended response. Standard-sized copies of process anchor charts are especially useful for students.
Strategy anchor charts support students in developing strategic behaviors such as choosing what to do when encountering an unknown word while reading or how to use the text features of a nonfiction book. Consider sharing standard-sized copies of strategy anchor charts with interventionists who work with your students. It is important that these students hear consistent language.
Reflections
Pay attention to your anchor charts. Are the students using them or asking you for information available on the charts? How long do the students need them? Anchor charts would make a great topic for a grade-level team meeting. Share charts that are working well. Even more important, share the ones that didn't work out and talk about why that was the case.


